
Each webpage has its own permissions, controlling who can view it and who can add, edit, or delete its content.
Getting There
- Open the webpage in Page Builder, whether you’re creating it or editing an existing one.
- In the Permissions card, click Manage Permissions.
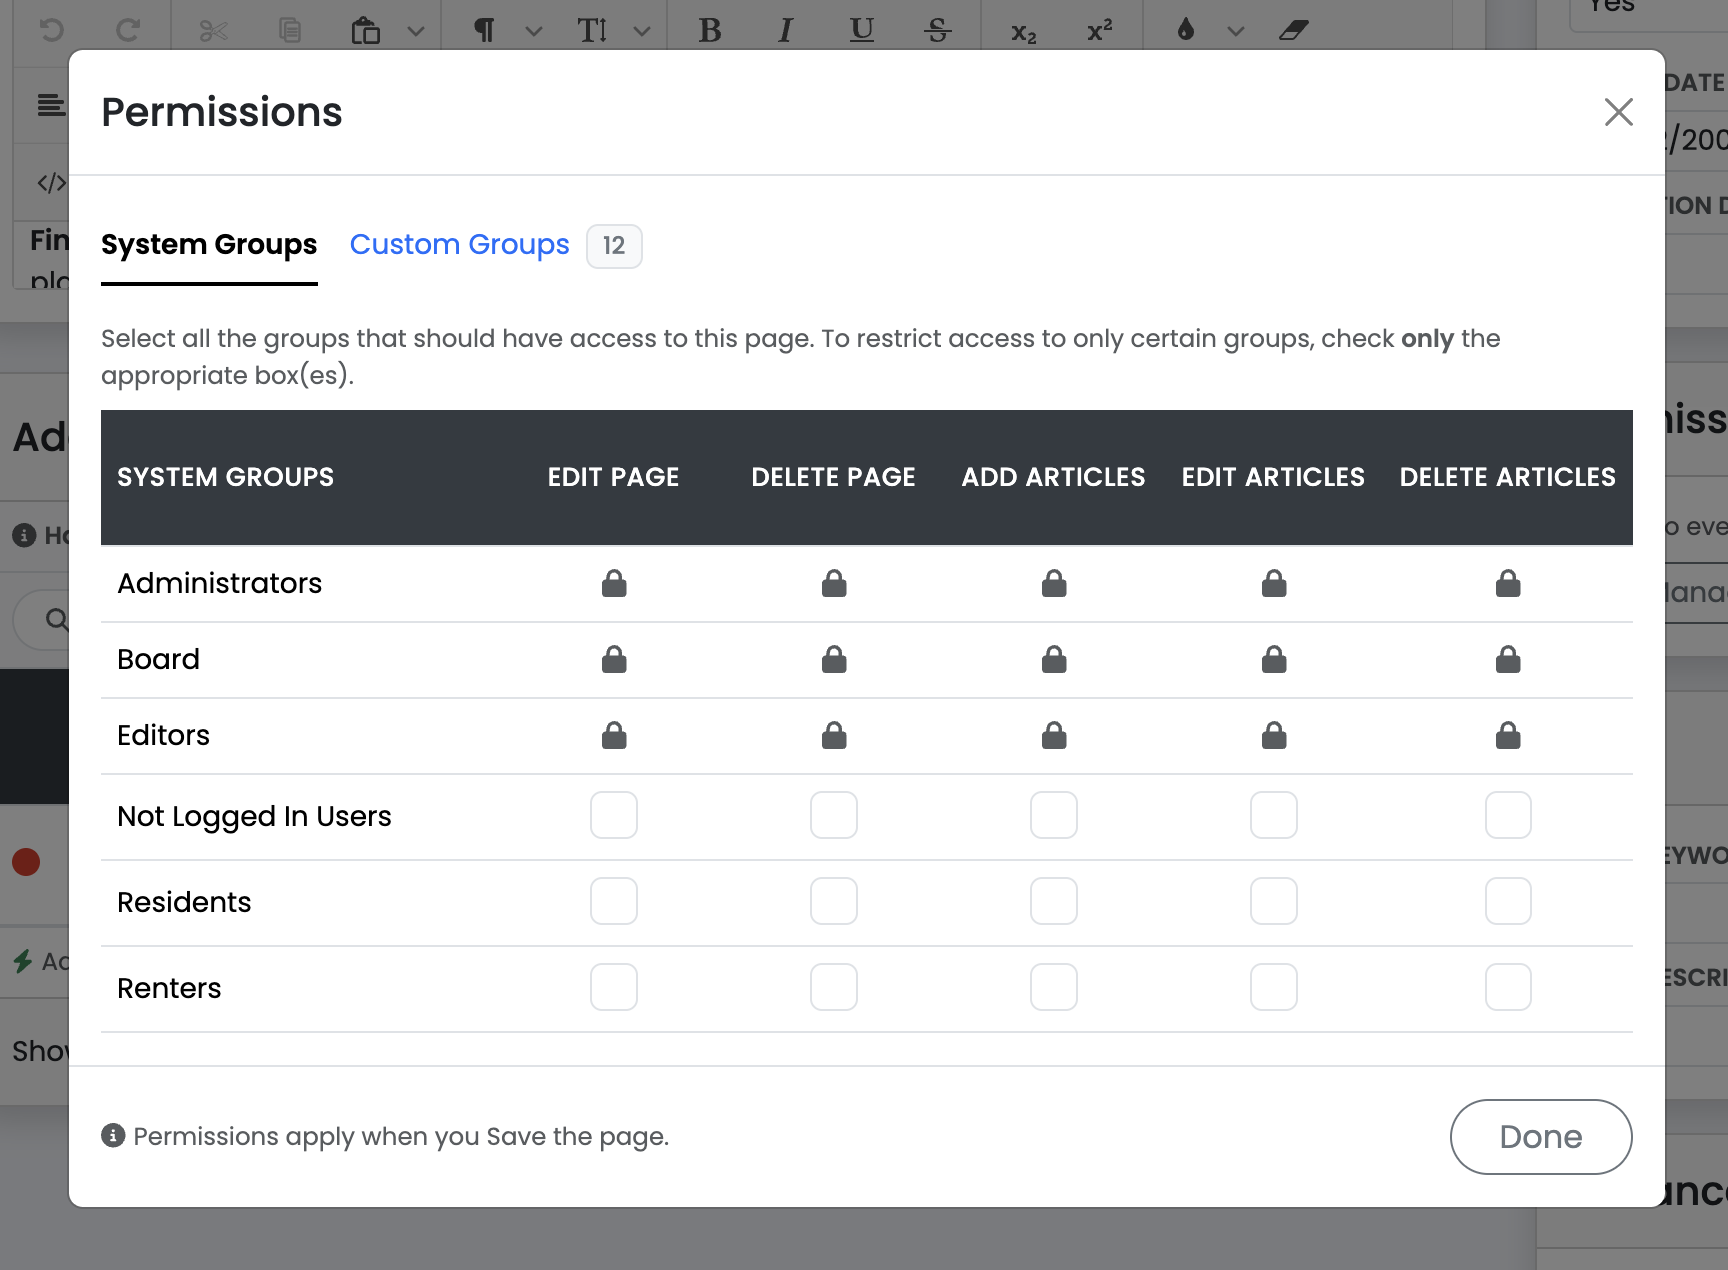
System Groups Tab
A table lists Administrators, Board, and Editors first — these three always have full access and can’t be restricted. Below them:
- Not Logged In Users (anonymous visitors)
- Residents
- Renters
For each of these three groups you can check or uncheck view, Edit Page, Delete Page, Add Articles, Edit Articles, and Delete Articles.
To restrict a page to only certain groups, check the view box for only the appropriate group(s) and leave the rest unchecked.
Custom Groups Tab
If your community has custom groups set up, they appear here with the same permission columns. A custom group’s checkboxes are locked to at least whatever access Residents already have — if Residents can view the page, every custom group can too, and that checkbox is disabled to reflect it.
If no custom groups exist yet, this tab shows a link to the Groups section where you can create one.
The Permissions Summary
Back on the main page, the Permissions card shows a plain-language summary of your current selections — for example, that the page is visible to Residents and Renters, or that residents can add articles. This text updates automatically as you change settings in the modal.
Permission changes only take effect once you click the page’s Save button — they aren’t saved automatically when you close the modal.