
Page Builder replaces the separate Webpages and Webpage Components screens with a single screen per page. This article walks through creating a brand-new webpage.
Getting There
- Log in to your site with an administrator account.
- Click Administer Site.
- Click Site Content, then open Page Builder.
- Click Create Webpage.
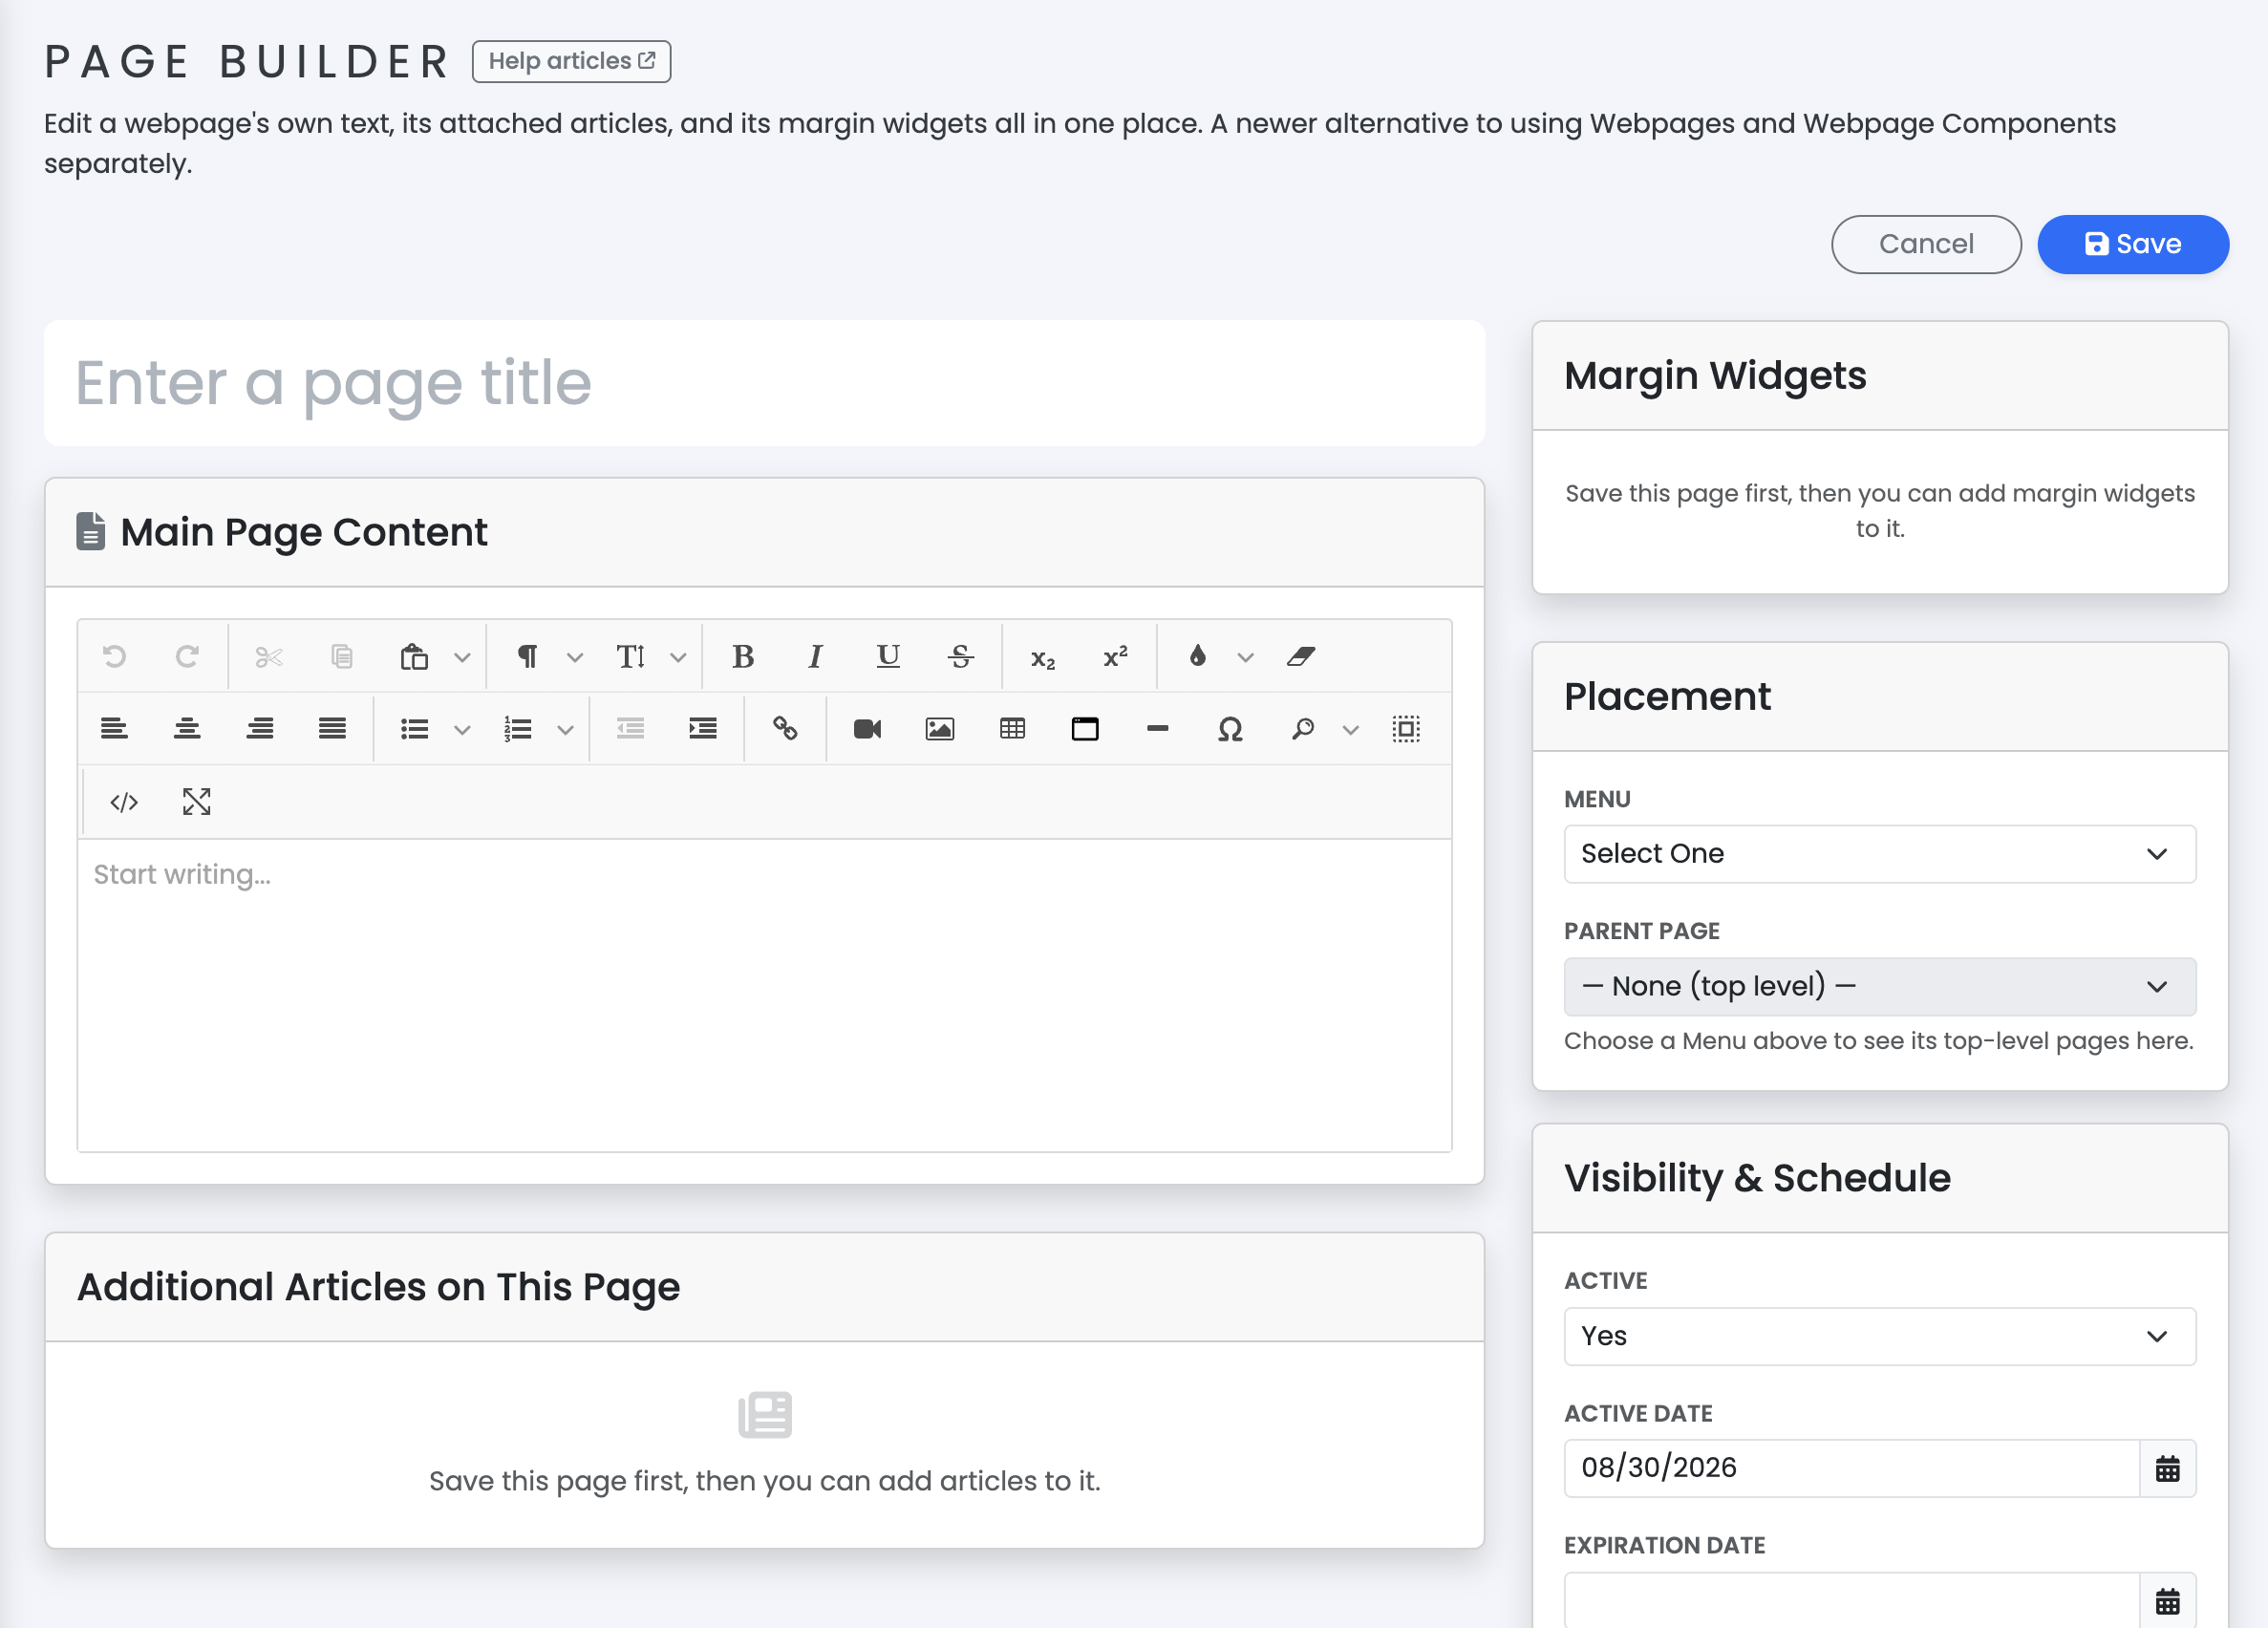
Filling Out the Page
Page Title
Enter the page’s title in the large text field at the top of the form. This becomes both the link shown in the menu and the heading at the top of the page.
Main Page Content
Use the Main Page Content editor to write the page’s own text. This content always renders first, with no title of its own, above any additional articles you attach later.
You can’t add additional articles or margin widgets until after you save the page for the first time. Those sections show a placeholder message telling you to save first.
Placement
- Menu — choose which menu (category) this page belongs to. Selecting a menu populates the Parent Page dropdown below it with that menu’s existing top-level pages.
- Parent Page — optionally nest this page under one of those top-level pages, or leave it as "— None (top level) —" to make it a top-level page itself.
Visibility & Schedule
- A status dropdown lets you set the page to Active, Hidden, or Inactive.
- The active date defaults to today. Leave the expiration date blank for a page that never expires.
Permissions
Click Manage Permissions to open the Permissions modal — see "Setting Webpage Permissions" for a full breakdown. By default, a brand-new page grants view-only access to Not Logged In Users, Residents, and Renters — the page is visible to everyone, including visitors, but none of them can edit the page, delete it, or add/edit/delete articles unless you turn those on yourself. (Administrators, Board, and Editors always have full access regardless.)
SEO
Optionally fill in keyword and description fields to help this page perform better in search results.
Advanced Settings
Set how many articles show per page, how they’re sorted (by publication date, ID, last updated, or title, ascending or descending), and whether to show each article’s title, date, and toolbar. These settings only take effect once the page has additional articles attached — see "Adding Articles and Margin Widgets to a Page."
Saving
Click Save at the top of the form. Once saved, the page reloads in the full Page Builder editor, where you can attach articles and margin widgets.