
Beyond a page’s Main Page Content, you can attach additional content items to it — either as articles in the main content area, or as widgets in the right-hand margin.
Adding an Article
- Open the webpage in Page Builder (see "The Page Builder Editor Screen").
- In the Additional Articles on This Page card, click Add Article.
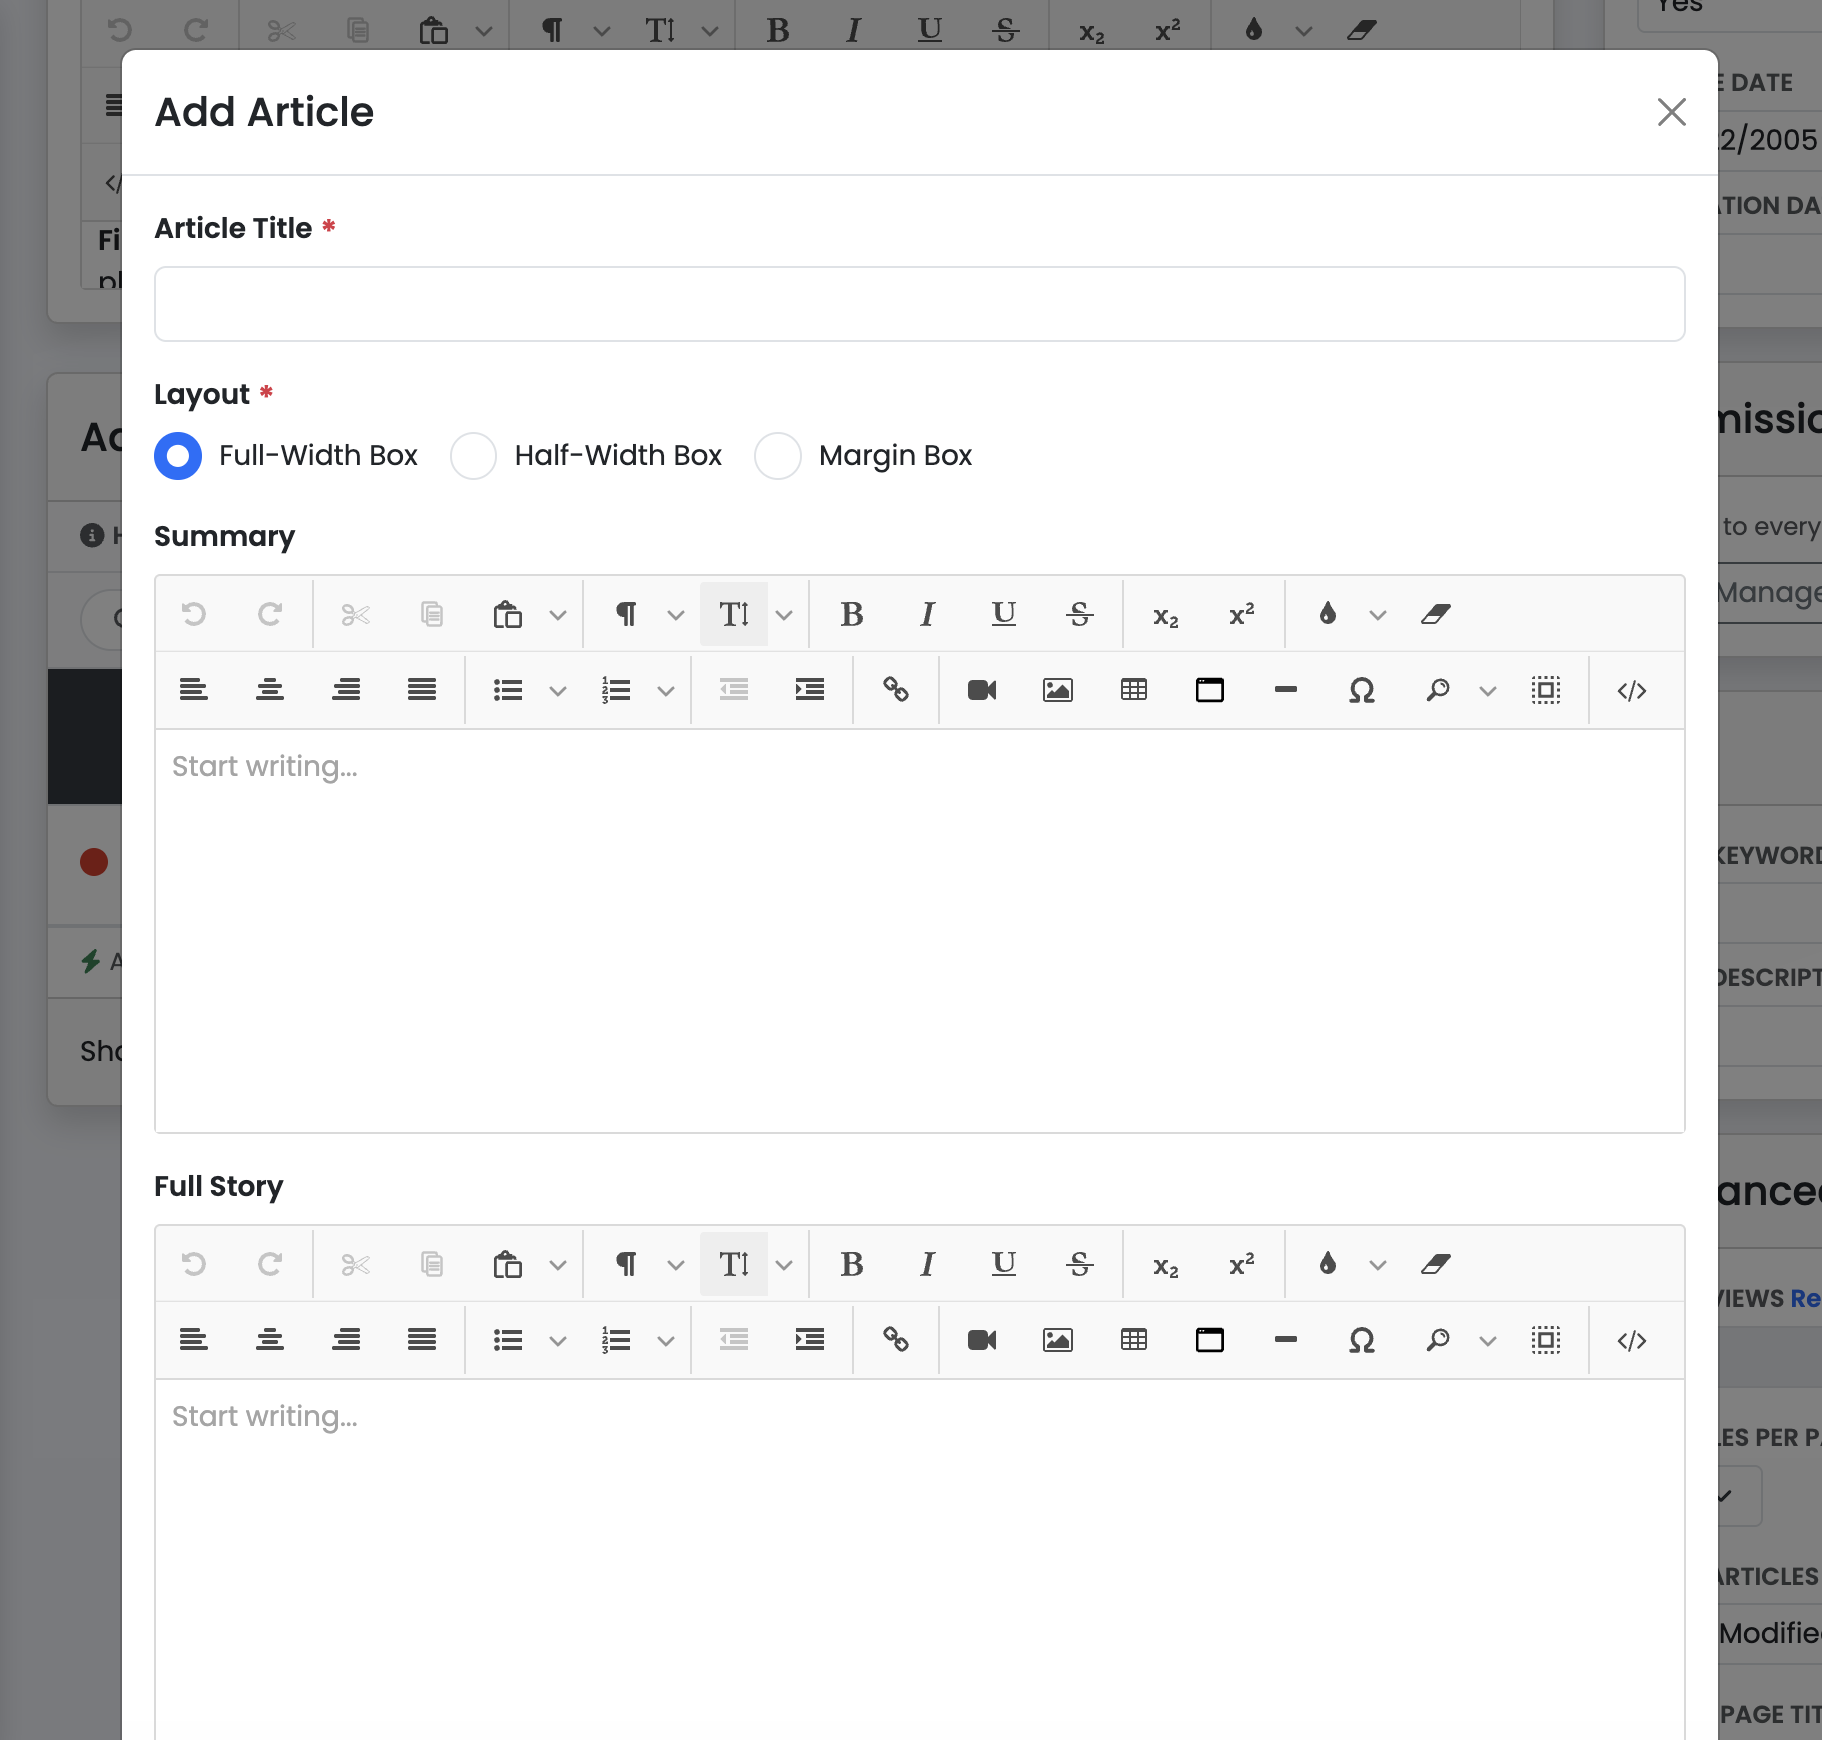
- Fill in:
- A title.
- A layout choice — display the article as a two-per-row teaser, in full below the main content, or as a margin widget.
- A short teaser/headline text field and a full body text field.
- A status choice — Active or Inactive.
- Click Save.
An article’s layout choice can move it between the Additional Articles list and the Margin Widgets list. Both sections refresh together whenever you save, so a change here always shows up in the right place immediately.
Adding a Margin Widget
- In the Margin Widgets card, click Add Widget.
- The same form opens, pre-set to the margin layout.
- Fill in the same fields as an article and click Save.
Even when you open it from Add Widget, the popup that opens is titled "Add Article" — articles and margin widgets are the same underlying content type, distinguished only by the layout you choose inside the form.
Editing or Deleting
Click any article’s or widget’s title to reopen the same form with its current content loaded. To delete it, click Delete in the footer of that form, then confirm in the dialog. This cannot be undone.
Global Items
Some articles and widgets are marked Global — these appear on every page, not just the one you’re viewing. They’re the same kind of content item, just not tied to a single page.
Saving Behavior
Adding, editing, and deleting articles or widgets all save immediately. Reordering margin widgets by dragging the handle also saves immediately. None of this requires clicking the page’s own Save button.